Turn a plain selfie into a business headshot
The Genosai headshot studio takes an ordinary phone photo and turns it into a clean professional portrait for LinkedIn, a CV, a company team page or a speaker card. You attach your own picture, answer a few questions in plain English and get several finished shots to choose from. There is nothing to install and no settings to learn, the whole job happens inside one chat.
Updated: August 10, 2026
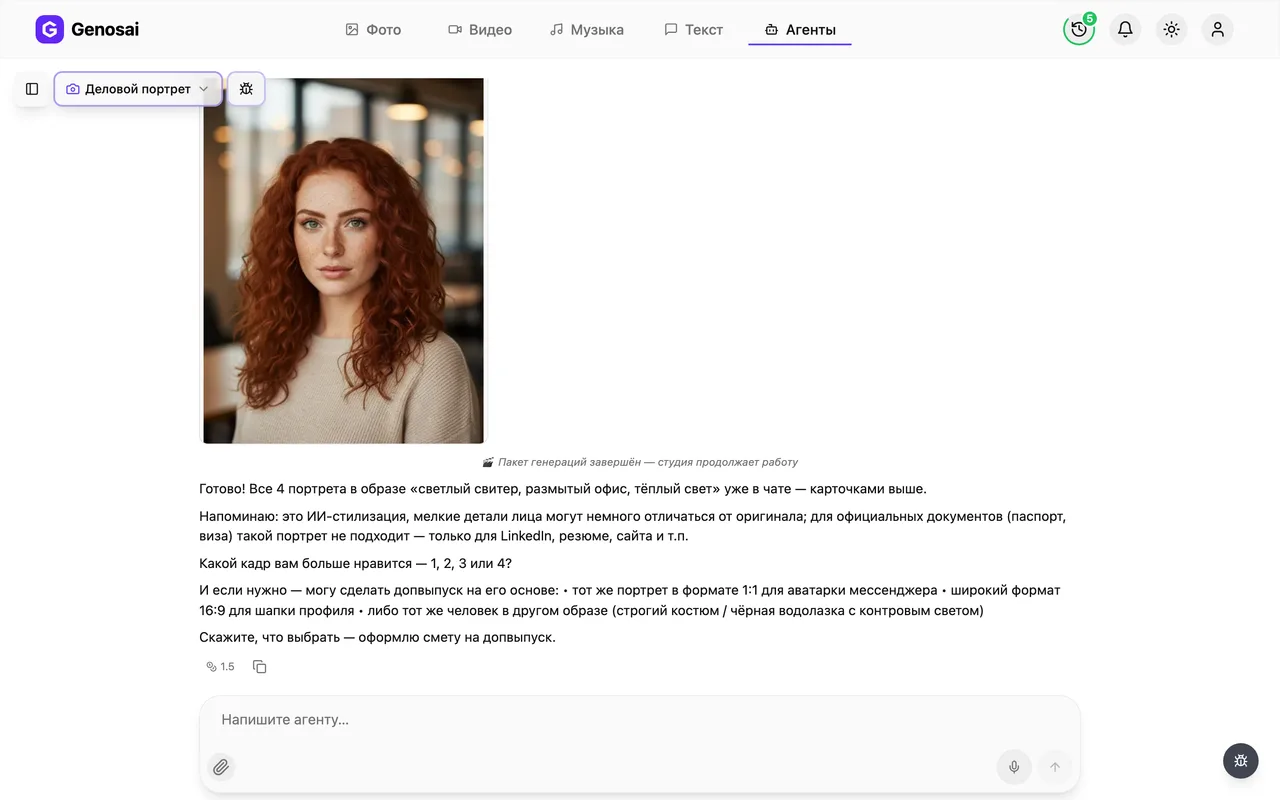
- Your own face — Every shot is built from the photo you attach, so the portrait stays recognisably you, not a stranger in a suit.
- Three ready looks — You do not have to invent anything. The agent proposes outfit, background and lighting options and you simply pick one.
- A set, not one shot — Each run returns several portraits with different angles and lighting, so you always have something to compare and choose from.
- Price before you pay — The cost appears as a separate estimate card. Nothing is deducted from your balance until you press the confirm button.
- Any crop you need — A square avatar, a vertical CV photo or a wide cover shot. You just say which one in plain words.
- No studio booking — No rented space, no photographer schedule, no week of waiting for retouching. A phone and ten free minutes are enough.
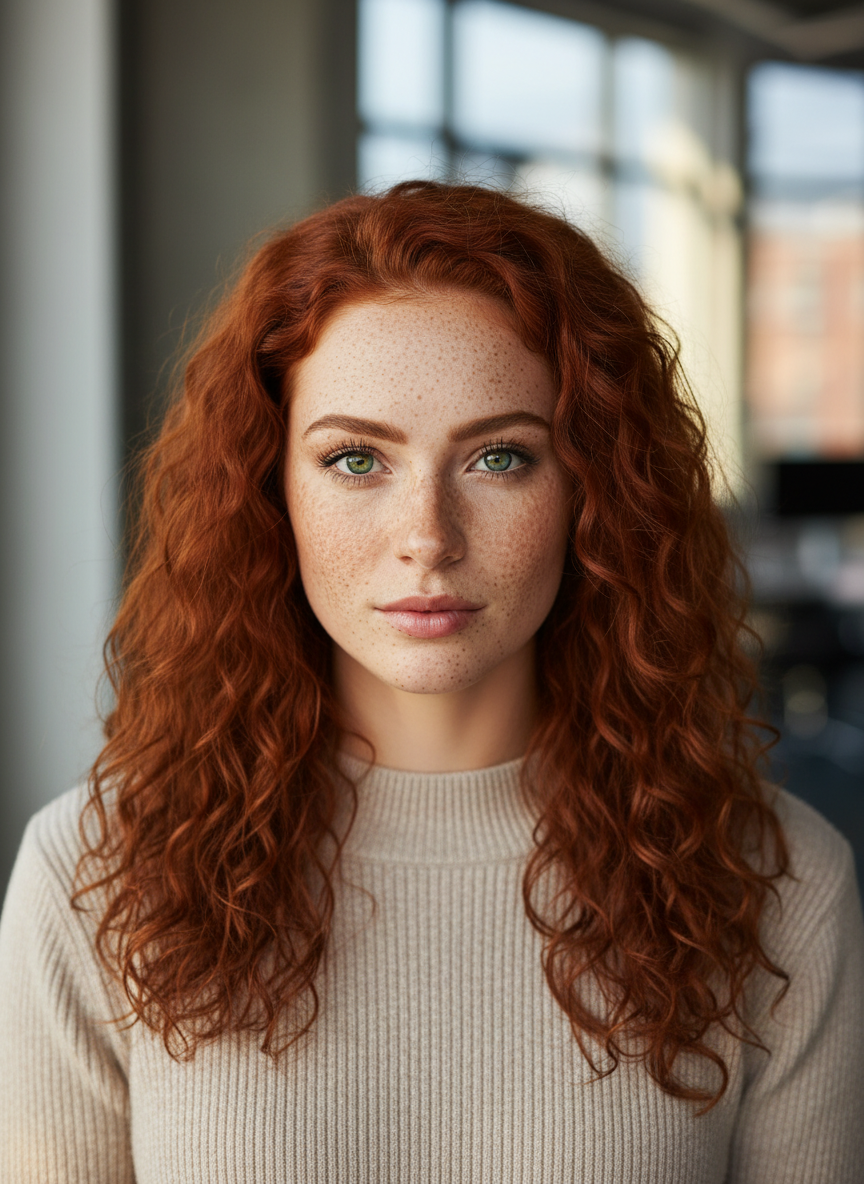
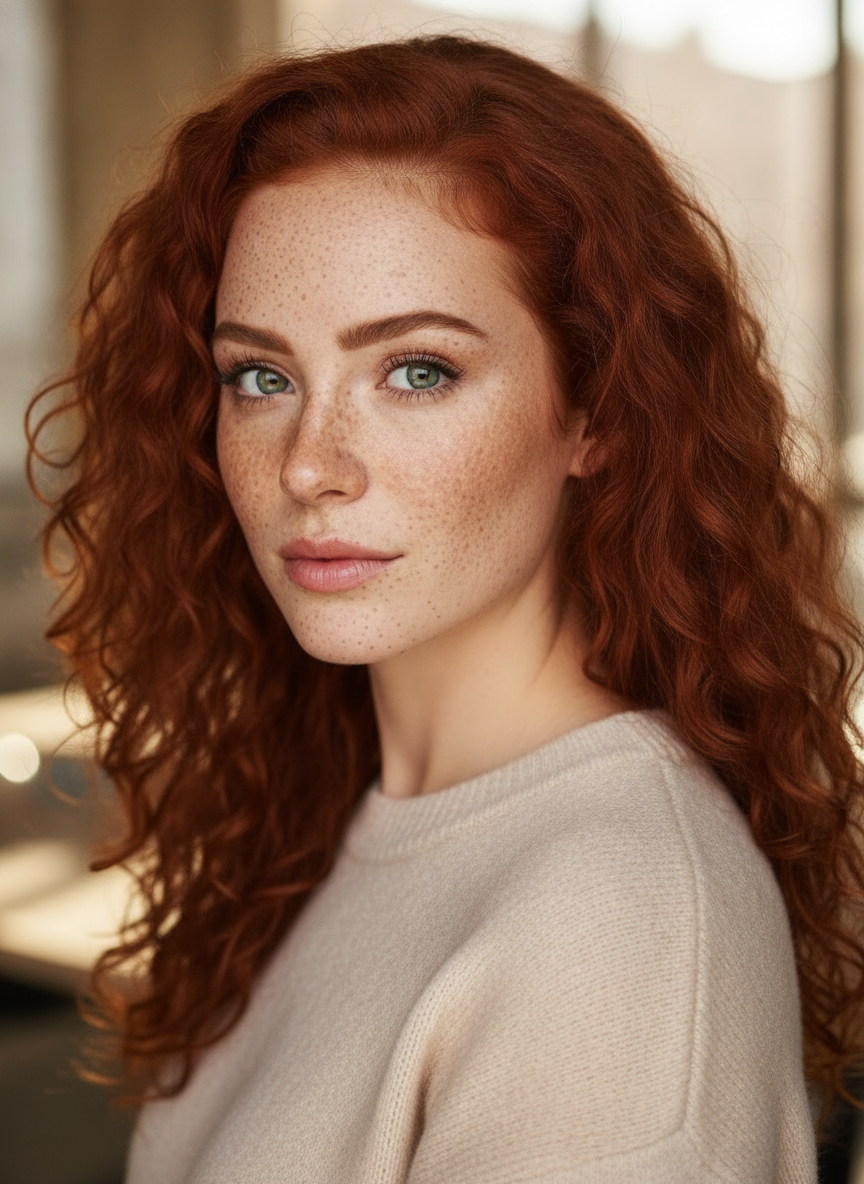
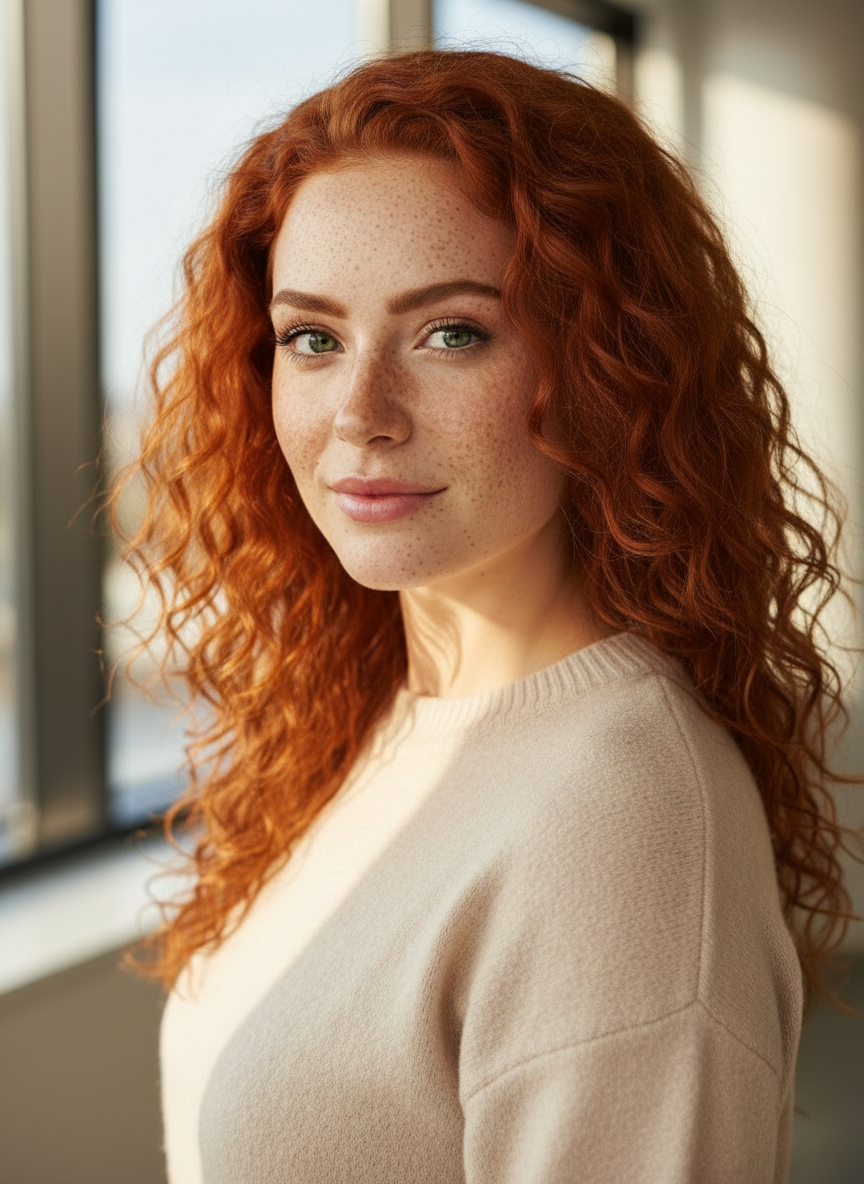
What it produced
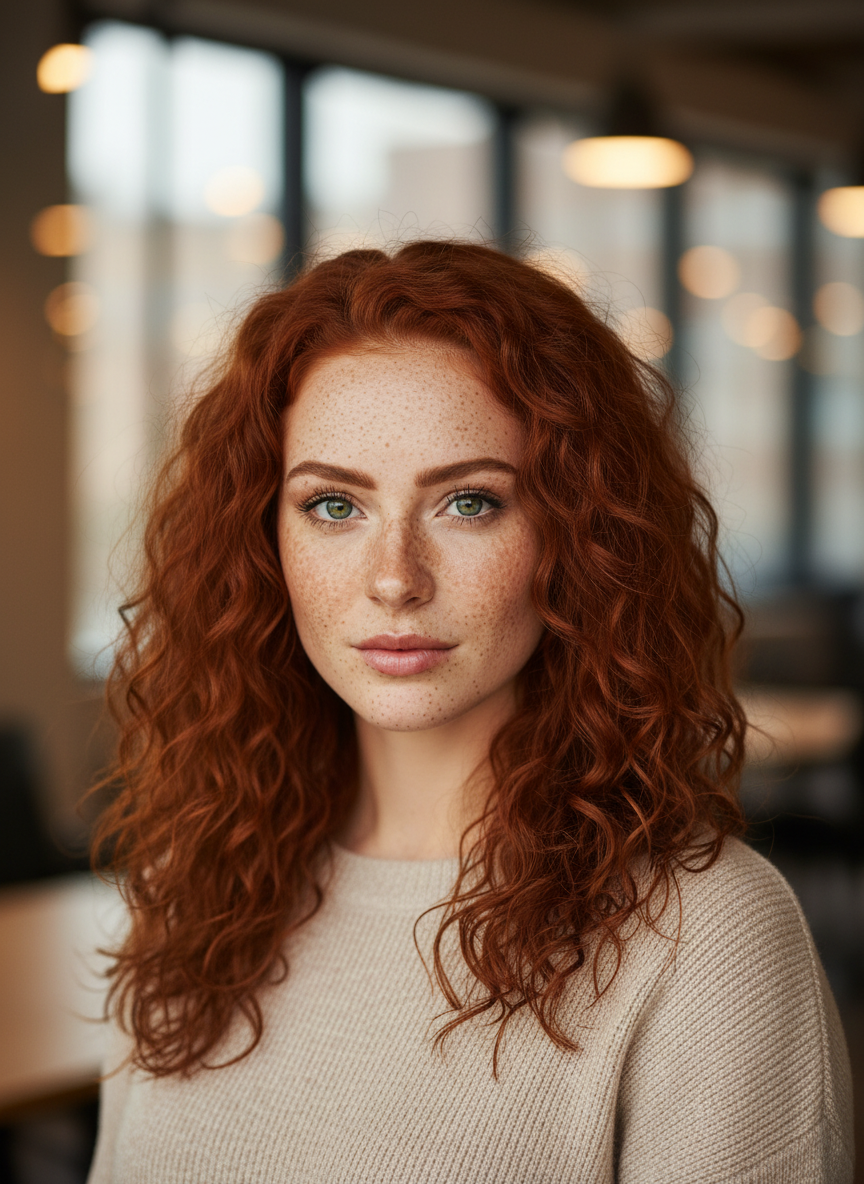
Step-by-step guide
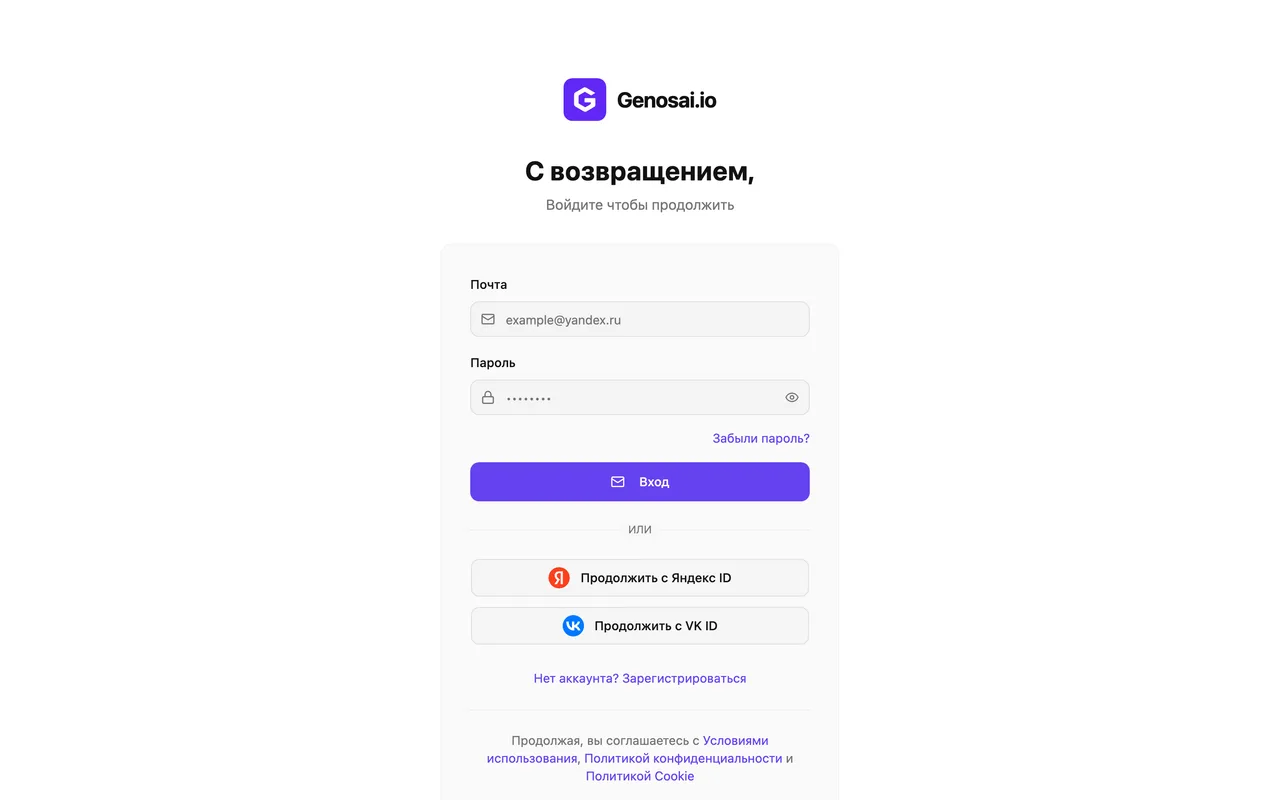
1. Step 1. Create a Genosai account
Open the site and sign up with your email or a one-click login. It takes under a minute and no card is required. New accounts get starter credits, which is enough to try the studio for real.
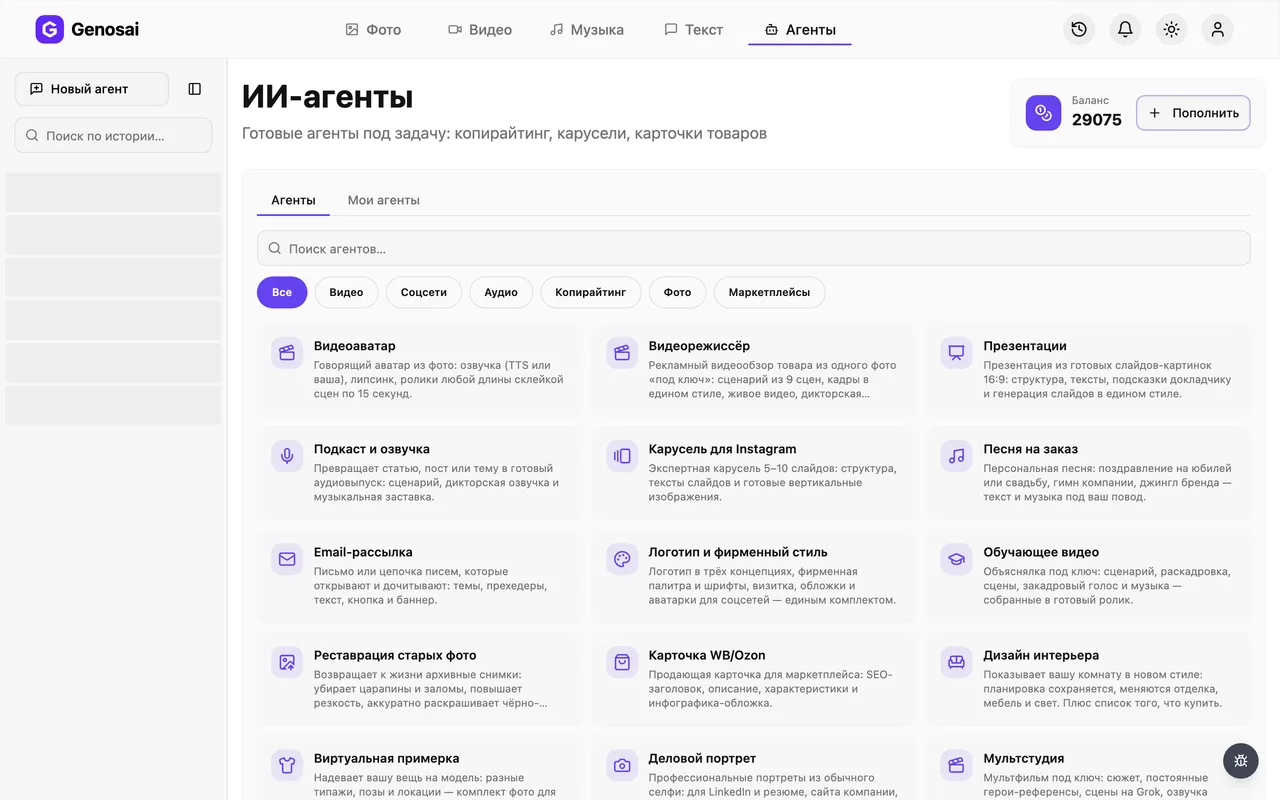
2. Step 2. Open the studio and the agents tab
After logging in you land in the studio workspace. At the top there is an agents tab, click it. An agent is a ready-made assistant that already knows one specific job and walks you through it.
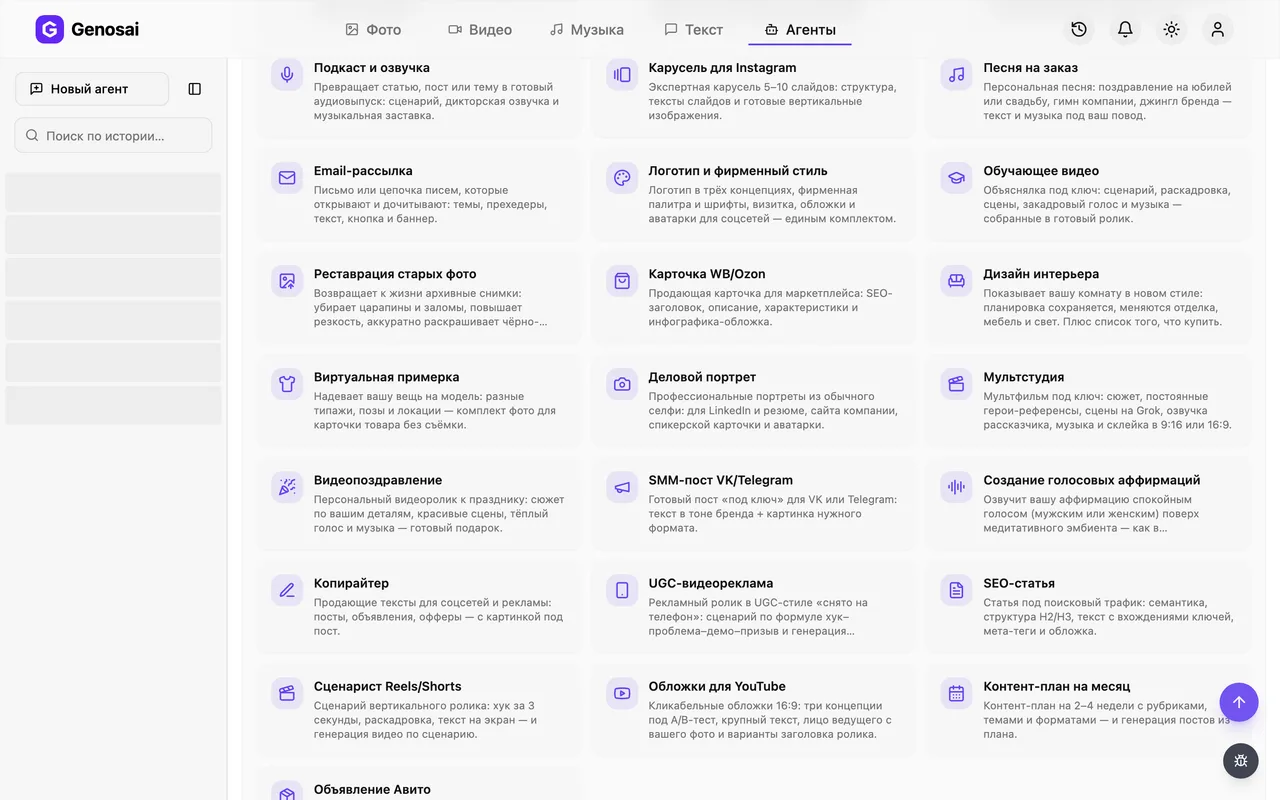
3. Step 3. Find the headshot studio
In the agent gallery pick the photo category or type headshot into the search box. Click the Business Headshot card to open a chat with it.
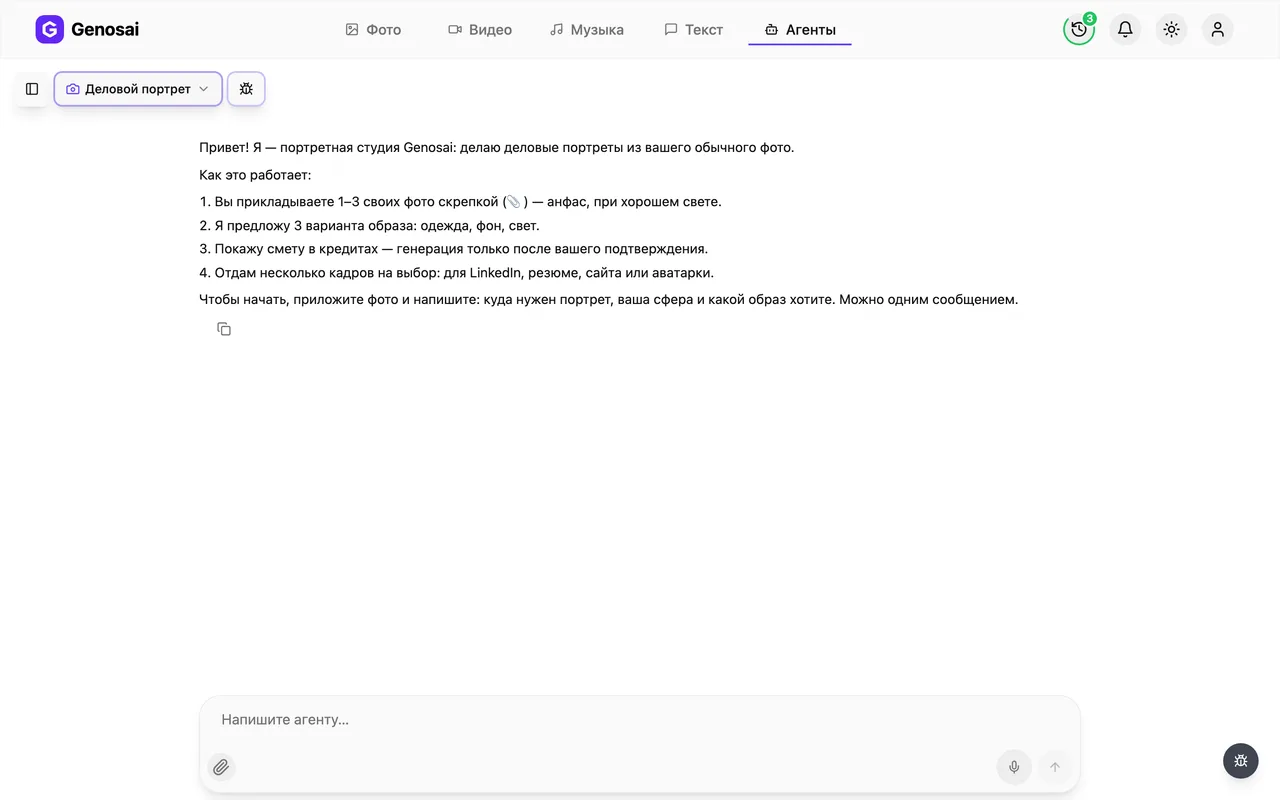
4. Step 4. Read the greeting
The agent introduces itself and explains the order of work: your photo first, then the look, then the estimate, and only after that the actual shoot. You reply in normal sentences, there are no commands to memorise.
5. Step 5. Attach your photos
Click the paperclip under the message box and pick one to three of your own pictures from your phone or computer. Front facing, well lit, face not covered. No external link is needed, the agent reads the attachment itself.
Skip dark room shots, sunglasses and heavy filters. Whatever is wrong in the source photo will show up in the portrait.
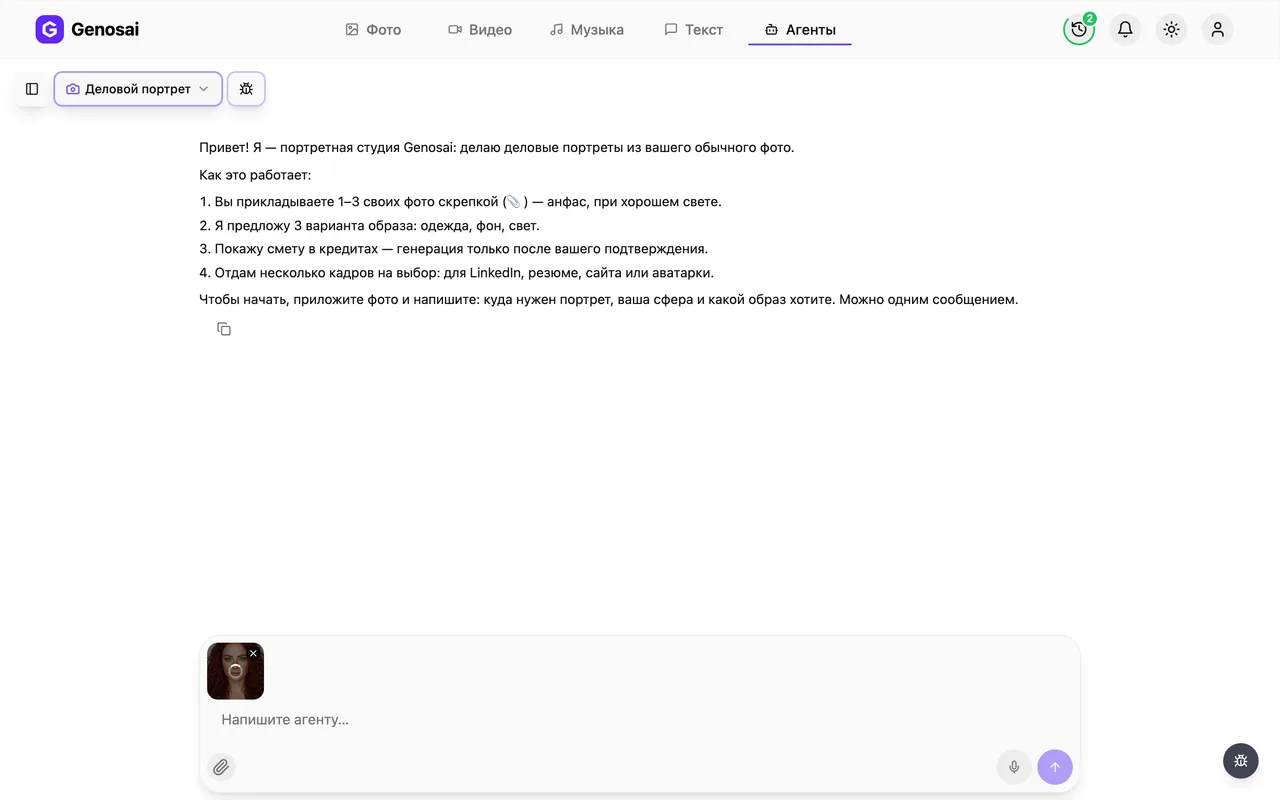
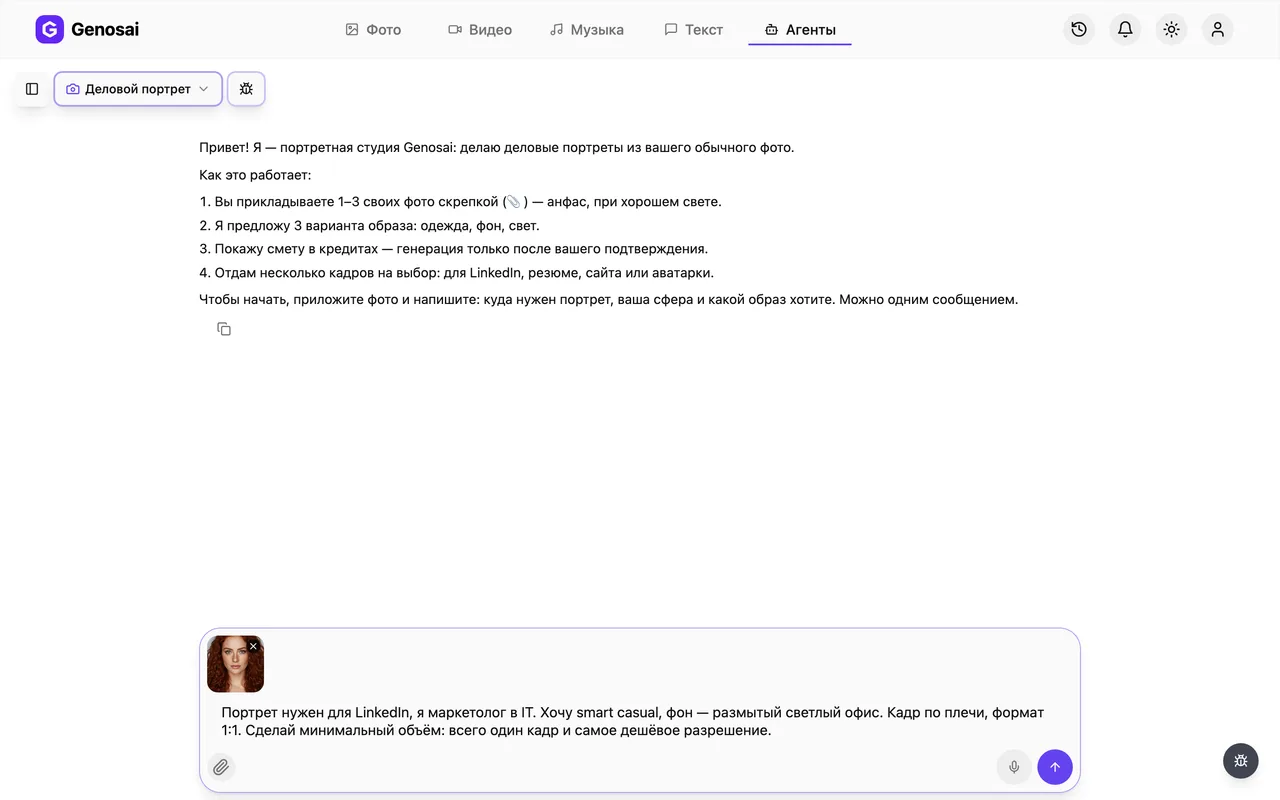
6. Step 6. Describe the portrait you want
Say where the portrait will be used, what field you work in and how formal it should look. The agent replies with three one-line looks, for example a navy suit on a grey studio wall or a light sweater against a blurred office. Pick one or ask to mix them.
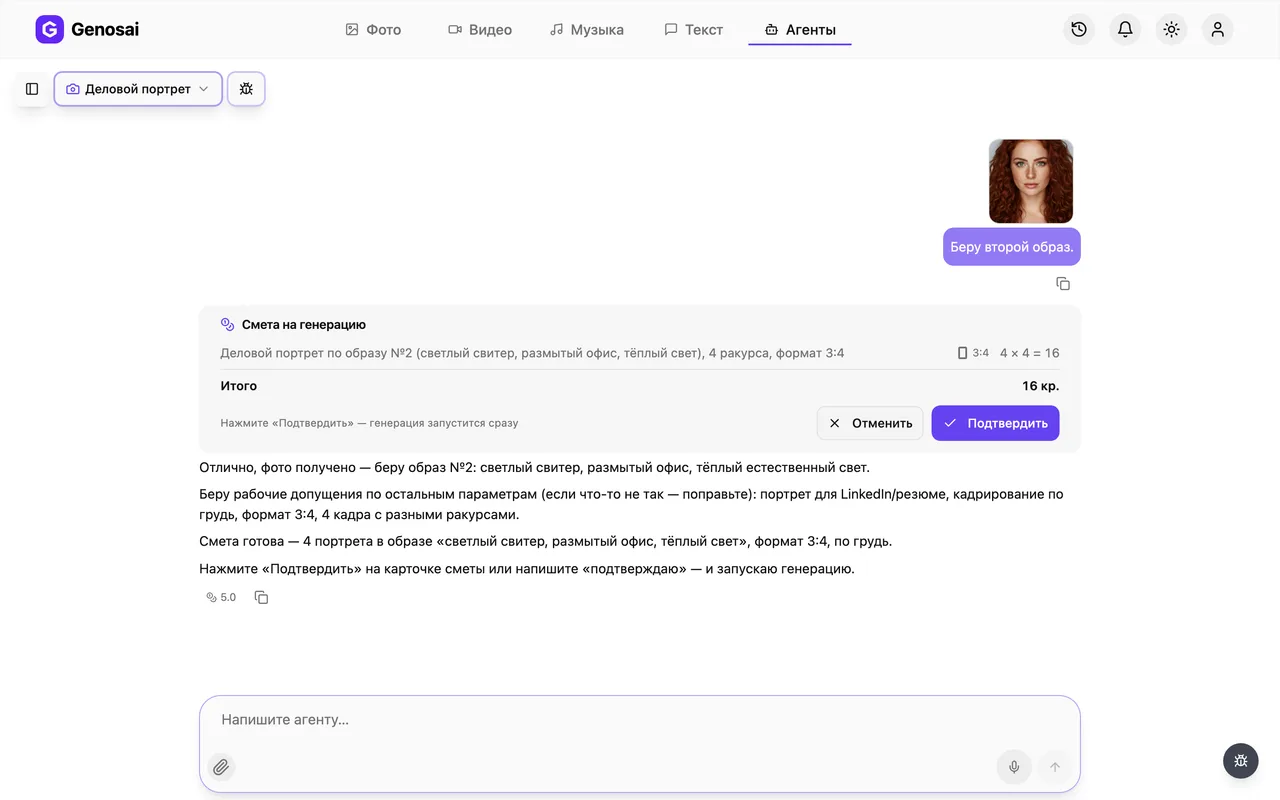
7. Step 7. Check the estimate and confirm
The agent posts a card with the credit cost of the chosen set. This is the only place money is spent. Read what is included, then press confirm or type the single word confirm in the chat.
Until that button is pressed nothing is charged. Long replies like yes sure go ahead are deliberately not treated as consent.
8. Step 8. Wait while the shots render
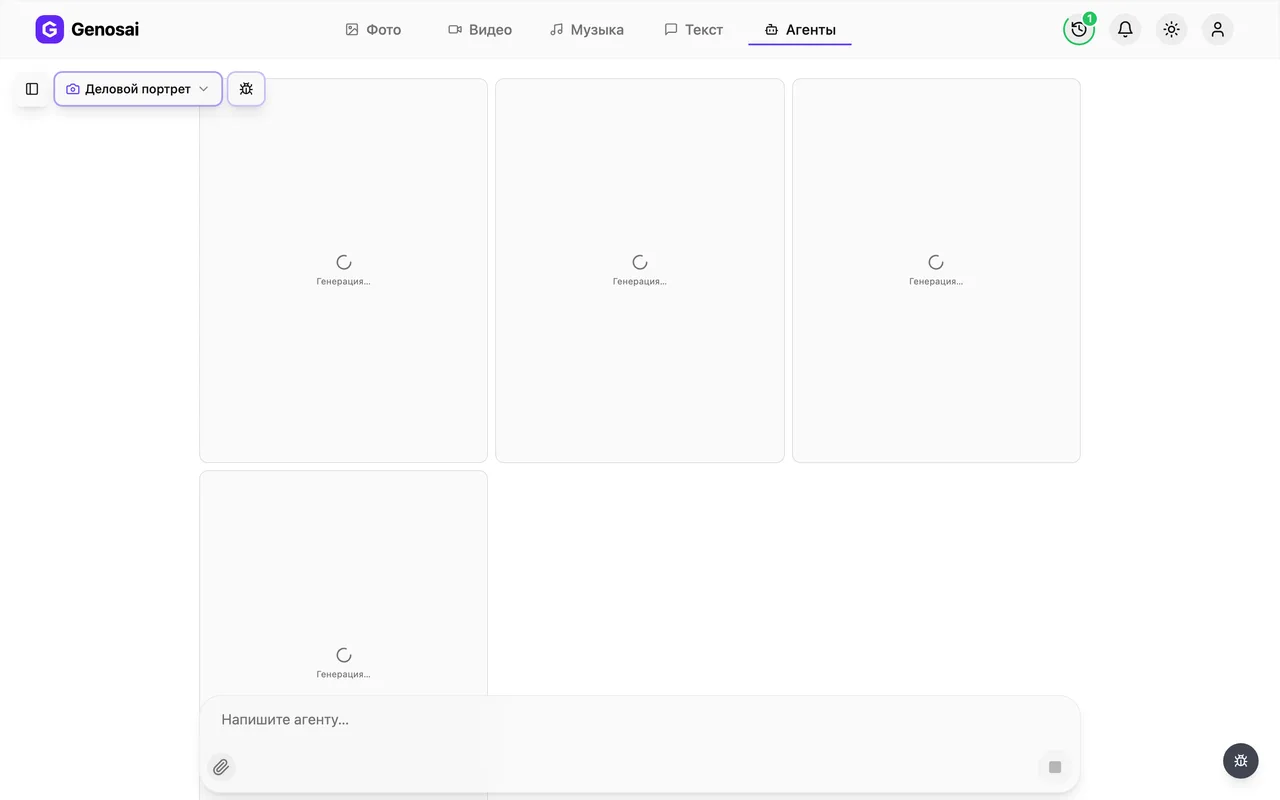
Generation starts and tiles labelled Generating appear in the chat, each turning into a portrait as it finishes. A set usually takes a few minutes. You can close the tab and come back later, the job keeps running.
9. Step 9. Download your portraits
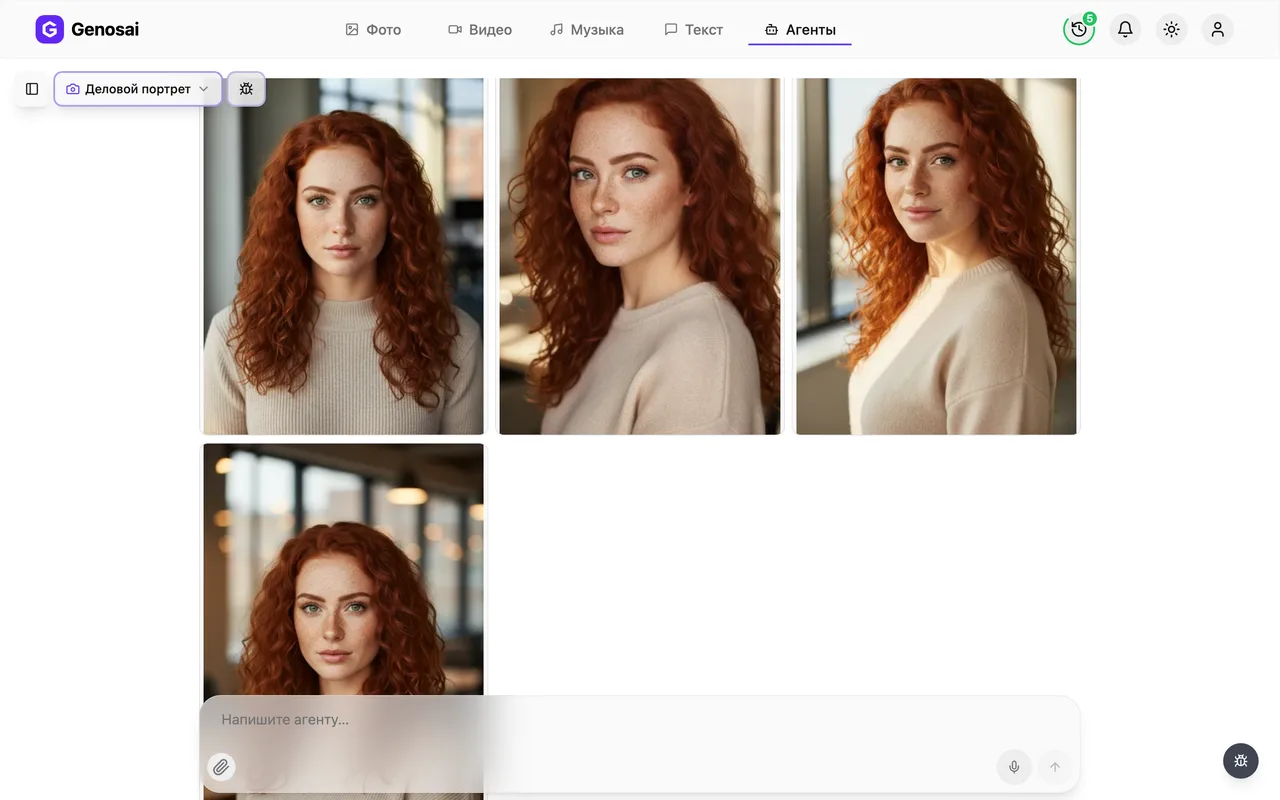
Finished shots arrive as tiles in the chat. Click the one you like to open the full screen viewer, where a download icon saves it. Tell the agent which one you like and it can rerun the same portrait in another crop or another look as a small separate estimate.
What this agent does
The Genosai headshot studio has one job: take an ordinary photo of you and turn it into a business portrait you are happy to put on a CV or a company website. Under the hood it is simply a chat. You attach a picture, the agent asks a few questions about where the portrait will live and how you want to look, and then it produces the shots.
The principle matters. The agent does not invent a random person in a suit. It takes the face from the photo you attached and places it in a new setting, changing clothing, background, lighting and depth of field. That is why the source picture drives the result: the clearer your face is, the closer the portrait will be.
What the agent can change for you:
- clothing, from a formal suit to a shirt, turtleneck, sweater, lab coat or uniform;
- background, such as a plain studio wall, a blurred office, exposed brick or a light gradient;
- lighting, from soft diffused key light to window daylight or a rim light for a speaker card;
- framing, cropped at the shoulders, the chest or the waist;
- aspect ratio, square for avatars, vertical for a CV, wide for a profile cover.
Who it is for
Anyone who needs a portrait tomorrow and has no time to book a shoot. A job seeker refreshing a CV who does not want to crop a holiday photo. A freelancer building an about page. A speaker who was asked to send a picture for a conference banner. A small team whose avatars were all taken in different years, in different rooms and different light, when what the team page really needs is one consistent row of faces.
There is another group worth naming: people who simply feel awkward in front of a camera. Here nobody asks you to pose on command. You hand over one picture you already like, and the studio does the rest.
What to prepare first
Preparation takes two minutes and it decides the outcome.
The photo itself. One to three pictures, face front on or slightly turned, eyes open and clearly visible. The best option is daylight from a window with you facing it. Avoid dark rooms, harsh direct flash, heavy filters, sunglasses and a hand near the face. Group shots where you have to be cut out are also a poor source.
A clear brief. Answer three questions for yourself: where the portrait will be published, what industry you are in, and how formal the look should be. A financial adviser and a nail artist look convincing in very different clothes and settings, and the agent needs to know which one you are.
Your credit balance. Credits are the internal currency of Genosai and they pay for generation. Check the balance in advance so you do not stall halfway through.
A real conversation walkthrough
Here is a shortened version of an actual exchange so you know what to expect.
You (attaching two selfies with the paperclip): I need a LinkedIn portrait, I work in accounting, formal but not gloomy.
Agent: Got the photos, your face reads clearly. Here are three looks:
- navy blazer, light shirt, grey studio background, soft key light;
- light sweater, blurred office behind you, warm daylight;
- black jacket, pale grey gradient, subtle rim light around the outline.
Which one, and which crop do you want, square for an avatar or vertical for a CV?
You: The first one. Vertical, and closer in, chest up.
Agent: Noted: look one, chest up, vertical format. I will shoot four frames with different angles and lighting so you have a choice. The estimate is below, press confirm if that looks right. Nothing is charged before you confirm.
*(an estimate card with a credit amount and a button appears in the chat)*
You: confirm
Agent: Shooting now, this takes a couple of minutes.
*(a progress indicator appears, then four portraits as cards)*
Agent: Done, four shots are in the chat. Which one works best? I can rerun the same portrait as a square avatar, or build the second look, as a small separate estimate.
Two details are worth noticing. First, the agent never quotes a price in plain chat, the amount always arrives as its own card. Second, pressing the button or typing the single word confirm is the only way to start the work. A long enthusiastic reply is deliberately not accepted as consent, so nobody gets charged by accident.
What it costs
There is no flat price for a portrait, and that is more honest than a price list. The cost is built from the volume of work: how many shots you order and which model renders them. The agent shows the exact credit amount in the estimate before launching, and until you press confirm nothing leaves your balance.
As a rough guide, a portrait set costs about the same as a handful of ordinary images in the studio. The conversation itself is billed separately and is very cheap compared with generation, so asking questions and changing your mind costs almost nothing. There is exactly one expensive step, and you control it.
If some frames fail for technical reasons, the credits for those frames return to the estimate and the agent reruns only the failed ones without charging you again.
Common beginner mistakes
A weak source photo. This is the number one reason people are disappointed. Darkness, noise, blur and filters do not disappear, they carry straight into the portrait. Spend a minute and take a fresh shot by a window.
A vague brief. Make it good is nothing for the agent to work with. Say where the portrait goes, what your field is and how formal it should be. One line like formal, for a law firm website changes the outcome more than ten rounds of edits afterwards.
Expecting documentary accuracy. An AI portrait is a stylised image. It looks like you, but it is not a photograph in the legal sense and it will not pass for official documents.
Trying to become a different person. Requests to remove twenty years or reshape the face are declined, and rightly so. The portrait should match the person who walks into the meeting.
Ordering one frame at a time. A set of several portraits is cheaper and faster because it renders in a single run, and it gives you an actual choice.
Why this beats doing it yourself
You could try to get a headshot from a general purpose image tool, but then everything is on you: choose a model that preserves identity, describe clothing, background, lighting and lens in technical English, remember to ask for natural skin texture and no plastic retouching, and set the aspect ratio. Miss one of those and you get a stranger in a nice suit.
The agent keeps all of that internally. It picks a model suited to faces, writes the technical description of the frame itself, adds the lighting and sharpness requirements, and makes sure the face stays yours. Your part is to say, in ordinary language, where the portrait is going and what you like.
Compared with a traditional shoot the difference is even starker: no booking, no travel, no makeup artist, no week between the session and the delivered files. The whole path fits inside one conversation.
Agents that pair well with this one
A portrait is rarely needed on its own, it usually sits on a page about you or your company.
- Logo and Brand Kit builds a mark and a colour palette so the portrait and the page around it look like one system.
- Copywriter writes the about text that sits next to the portrait on a site or a CV.
- Photo Restoration cleans up archive pictures if you also need historical or family shots nearby.
- Instagram Carousel turns the new portrait and your about text into a social post.
- Presentations puts your portrait on the title slide when you speak at an event.
The full catalogue with every category is on the all agents page, where you can try neighbouring studios on the same starter credits.
FAQ
Do I need a professional camera
No. A phone photo is fine. Light and sharpness matter far more than the camera: shoot in daylight facing a window, with no hat and no sunglasses.
How many photos should I attach
One to three. A single good front facing shot already works, but two or three angles help the agent hold your features more accurately.
Will the portrait actually look like me
Yes, keeping your face is the whole point of the agent. It is still a stylised image though, so small details such as moles, fine lines or eyebrow shape may differ slightly.
Can I use this for a passport or visa
No. Official documents require a real photograph that meets legal requirements. These portraits are for CVs, social profiles, company pages and speaker cards.
What if I do not like the result
Tell the agent exactly what is off: background too dark, wrong jacket, wrong angle. It will offer a corrected set as a new estimate that you confirm yourself.
How much does it cost
There is no fixed price. The cost depends on how many shots you order, and the agent shows the exact amount in credits in the estimate before launching. Chatting itself costs very little.
Can I make a portrait of someone else
Only with their consent and from their photo. The agent will not create portraits of celebrities or strangers, and it will not change a person's gender, race or age beyond recognition.