Virtual Try-On for Clothing Photos Without a Photo Shoot
Virtual Try-On is a Genosai agent that takes a photo of your product and shows it worn by a model: full length, three quarter turn, close-up on the fabric and from the back. You do not need a studio, a photographer or someone willing to pose all day. One clear photo of the item on a plain background and about ten minutes of chat is enough.
Updated: August 10, 2026
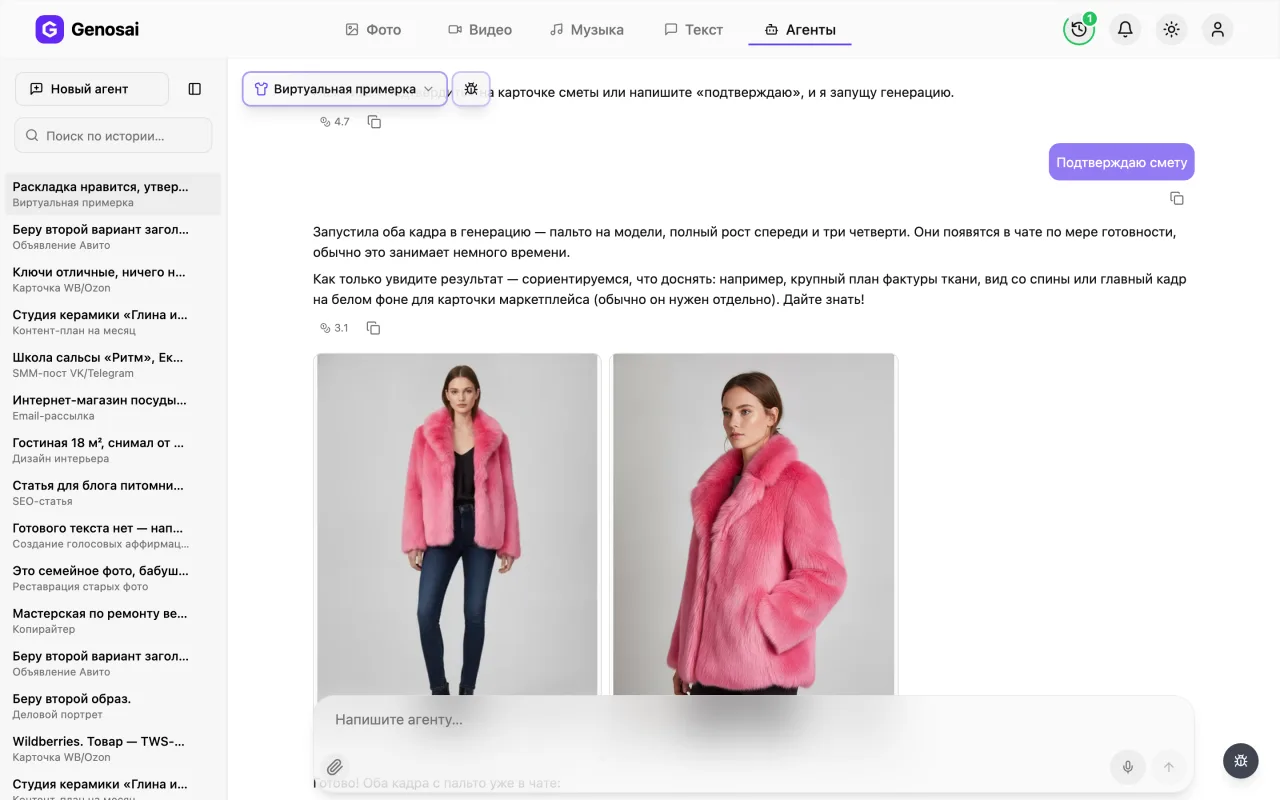
- Your item stays yours — The agent works from your photo, so colour, cut, print and fabric texture are preserved rather than invented.
- A full set at once — One run gives you a matched series of angles for a product card, not a single random picture.
- Any model you need — Pick gender, age, build and height. You can also try the item on your own full-length photo.
- Location on request — Bright studio for marketplaces, city street or cafe for social media. One sentence changes it.
- Estimate before any charge — The cost appears as a separate card first. Nothing is deducted until you press the confirm button.
- Plain everyday language — No sliders, no settings, no technical fields. You simply answer the questions the agent asks.
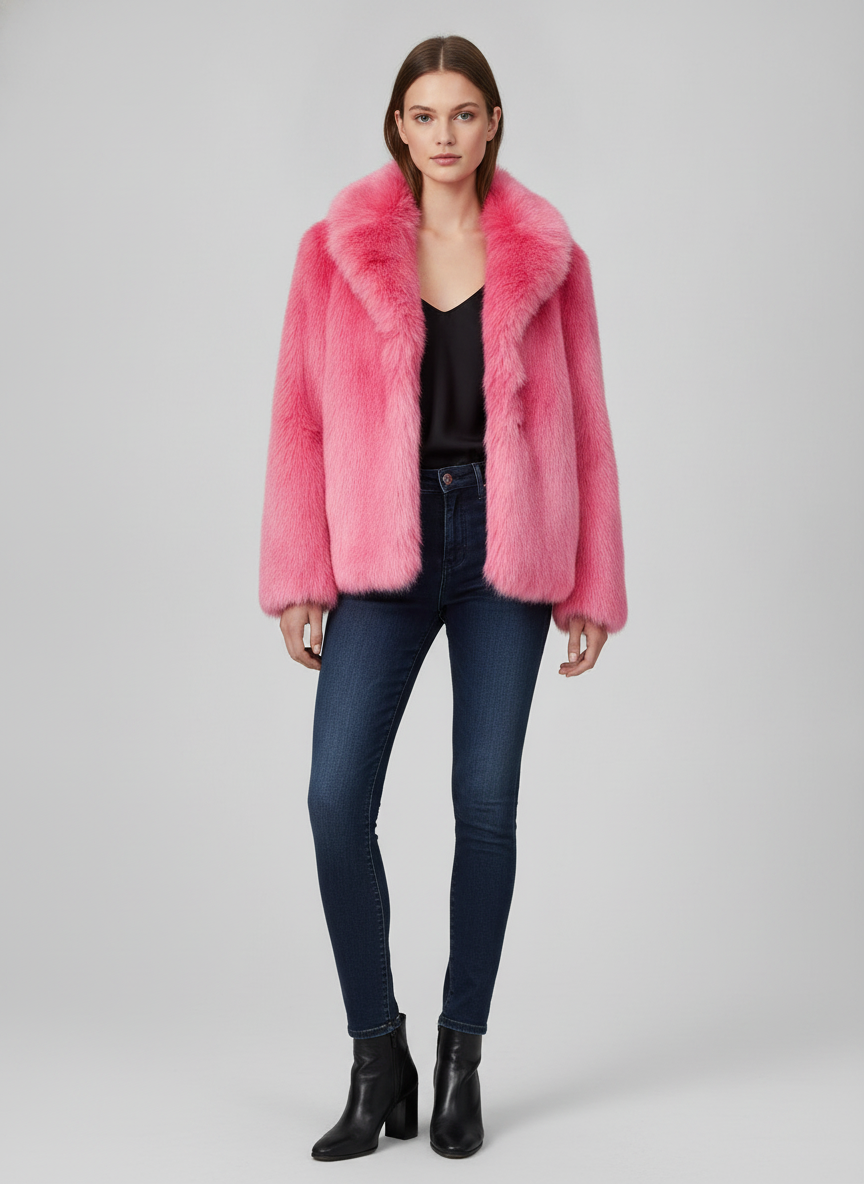
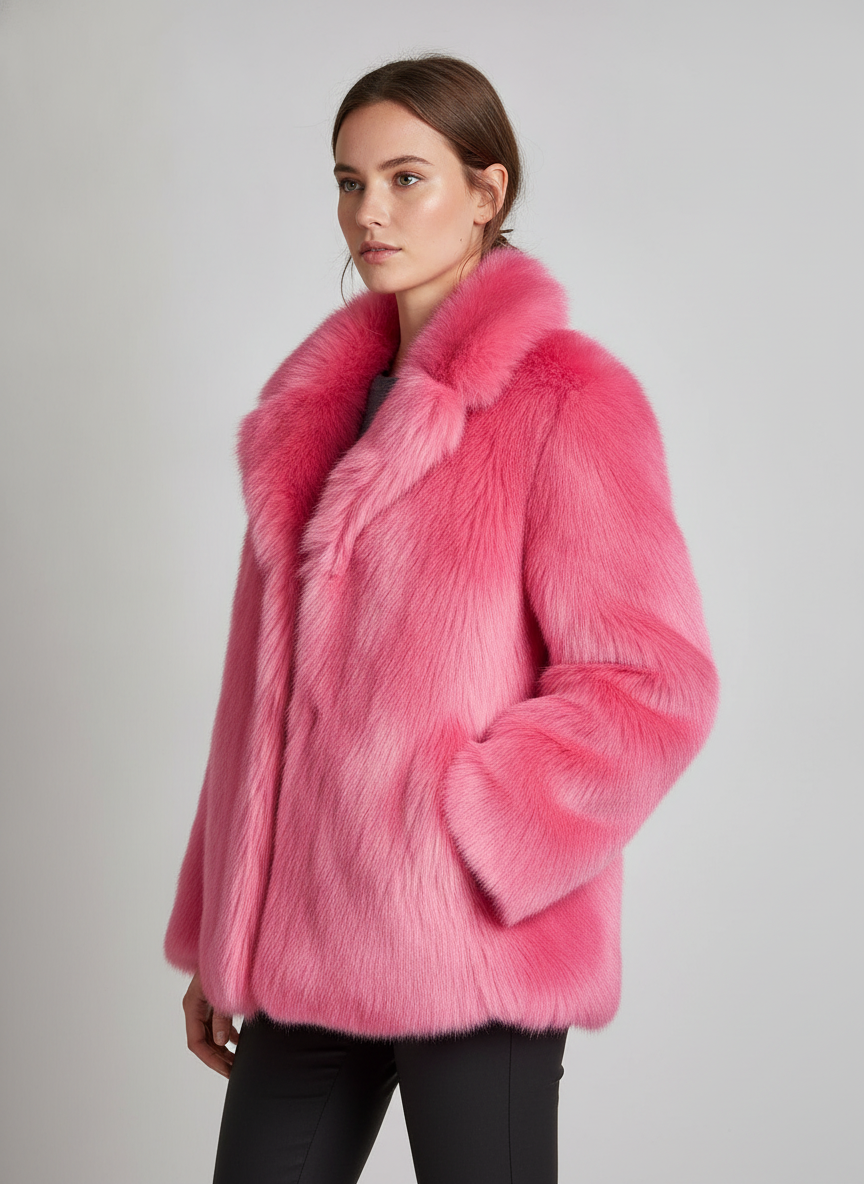
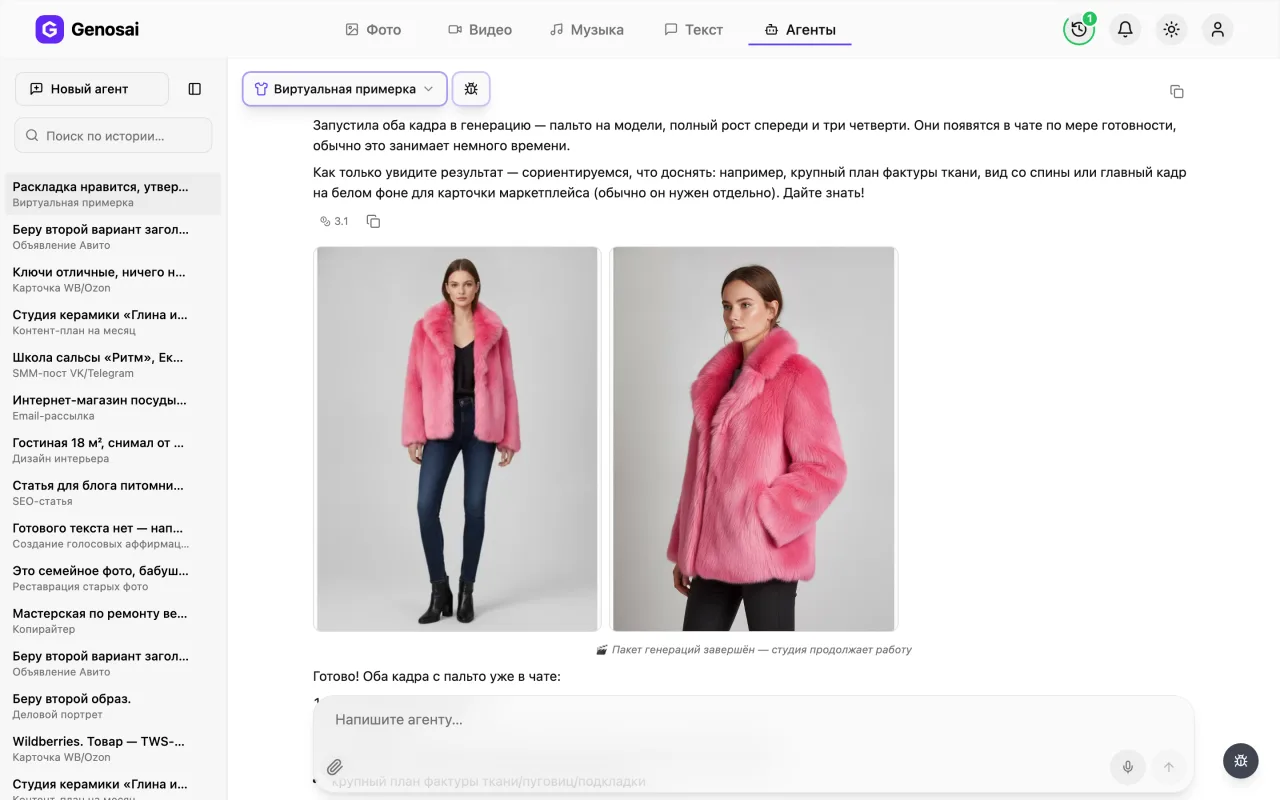
What it produced
Step-by-step guide
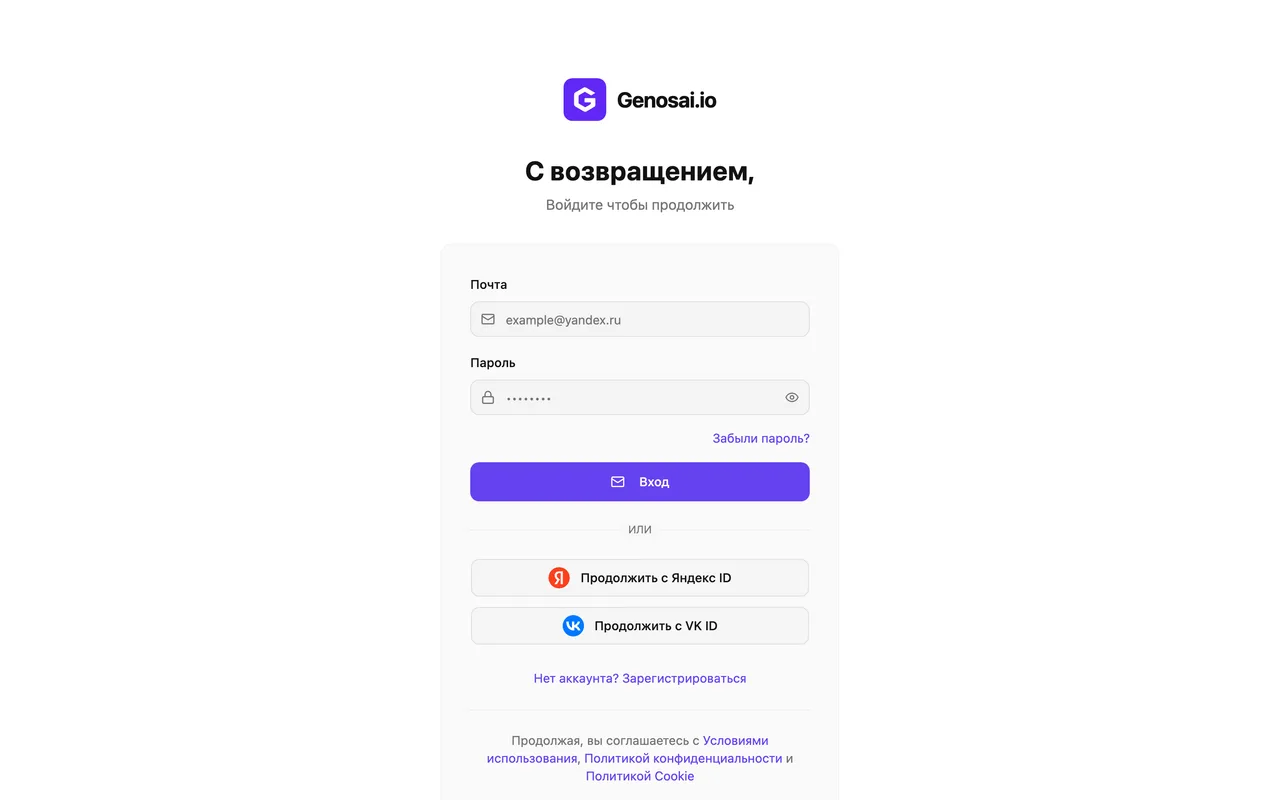
1. Step 1. Create your account
Open the Genosai site and press the sign-in button. You can register with an email address or with an existing account in one click. No payment details are requested at this point.
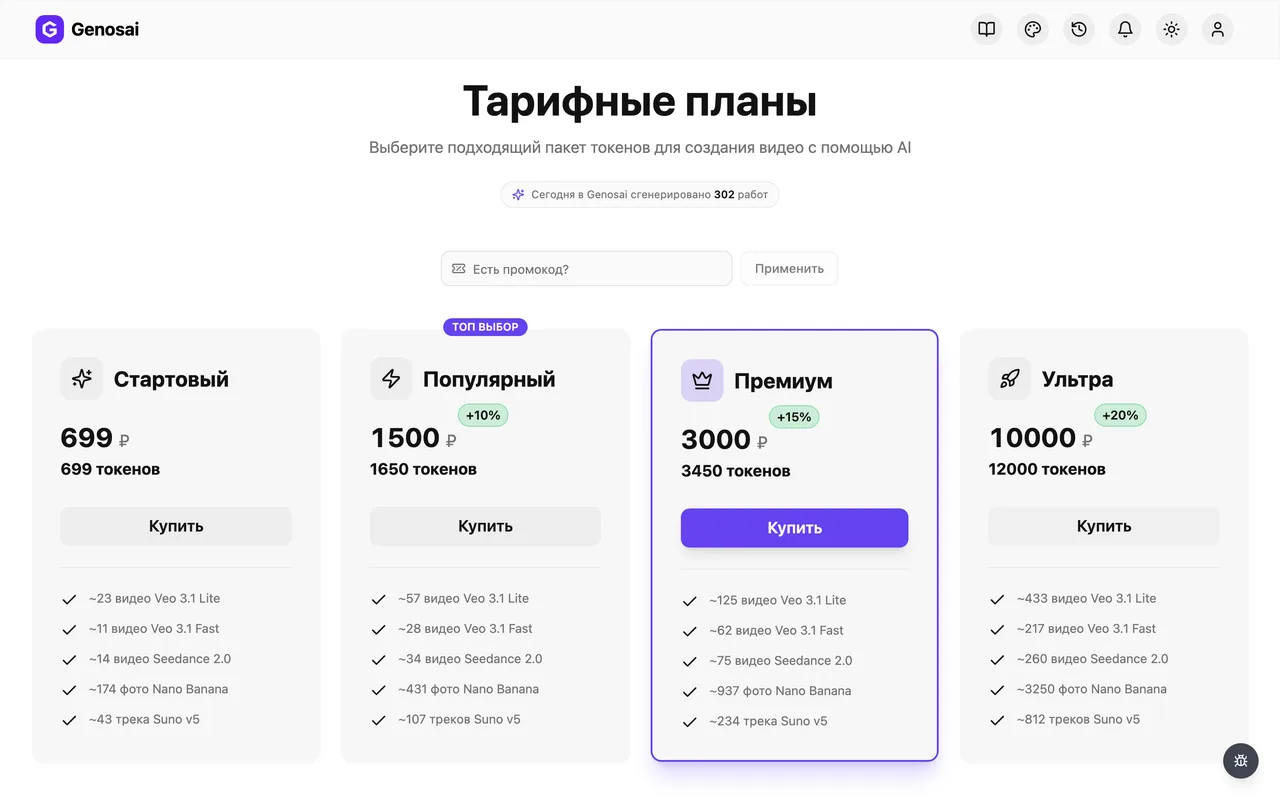
2. Step 2. Check your credit balance
Credits are the internal currency that pays for the work of the neural networks. Open the balance section and make sure you have some. New accounts receive a starter amount automatically, and you can top up at any time.
Credits are spent on finished images. The chat itself costs only a fraction of one.
3. Step 3. Open the studio
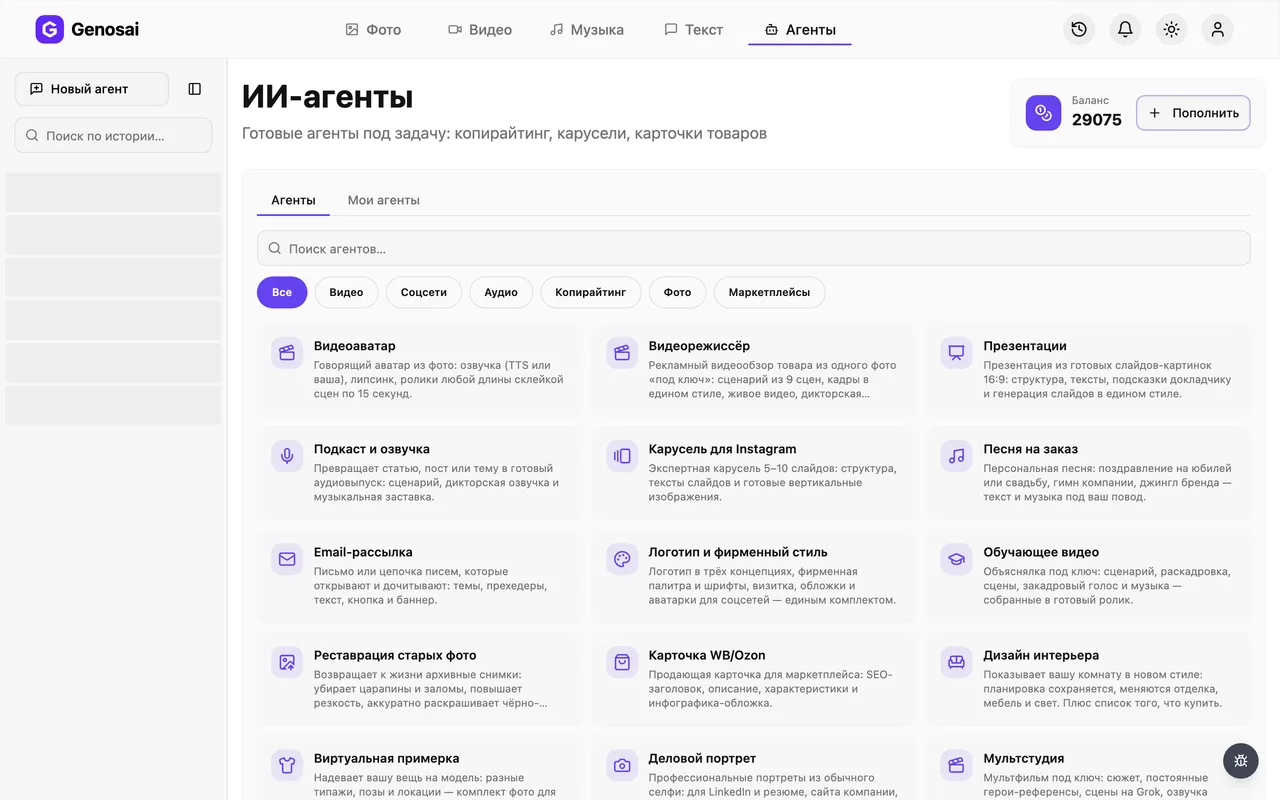
Press Studio in the top menu and switch to the Agents tab. The studio is your workspace, where every conversation and every finished file is stored. Nothing disappears when you close the browser.
4. Step 4. Find the try-on agent
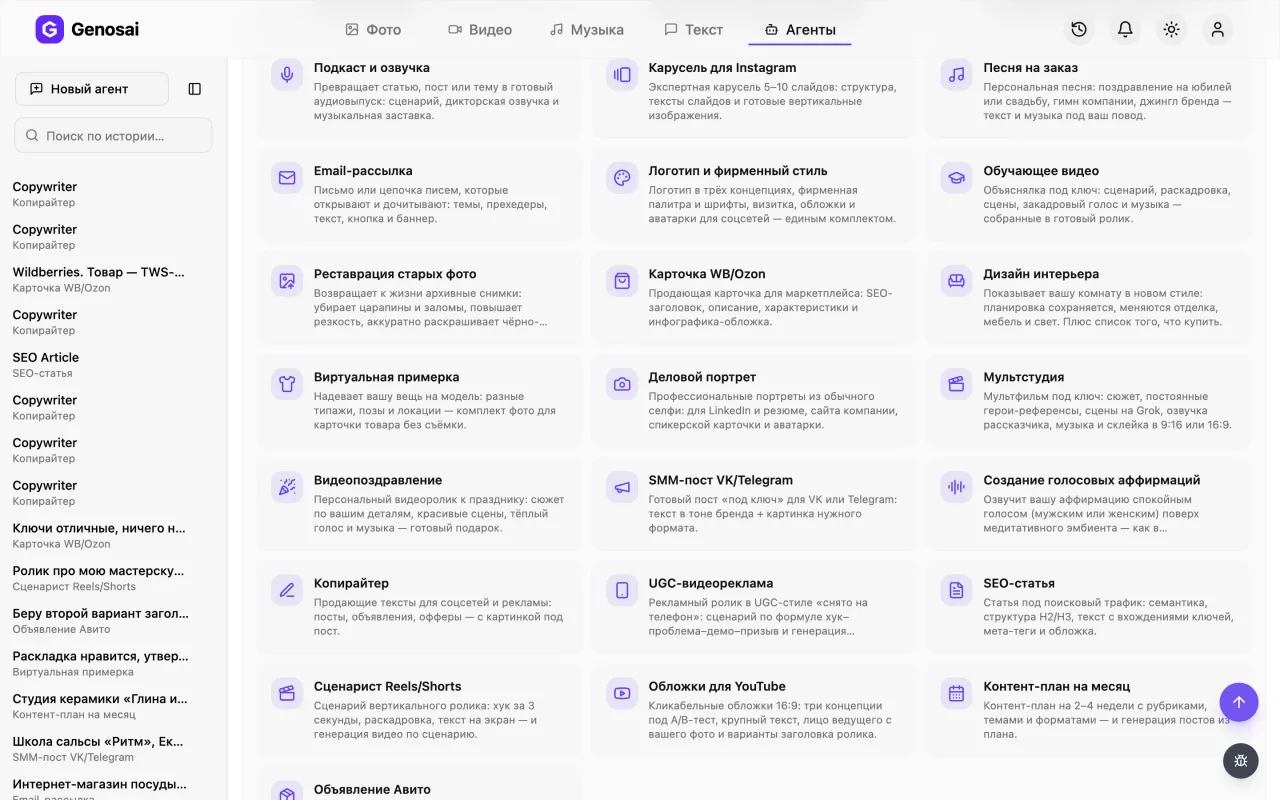
In the agent gallery open the e-commerce category or type the words try-on into the search box. The card you need carries a shirt icon. Click it to open the chat.
5. Step 5. Read the greeting
The agent introduces itself, explains the order of work and asks its first question. Answer in ordinary sentences, the way you would write to a person. Wording does not matter, meaning does.
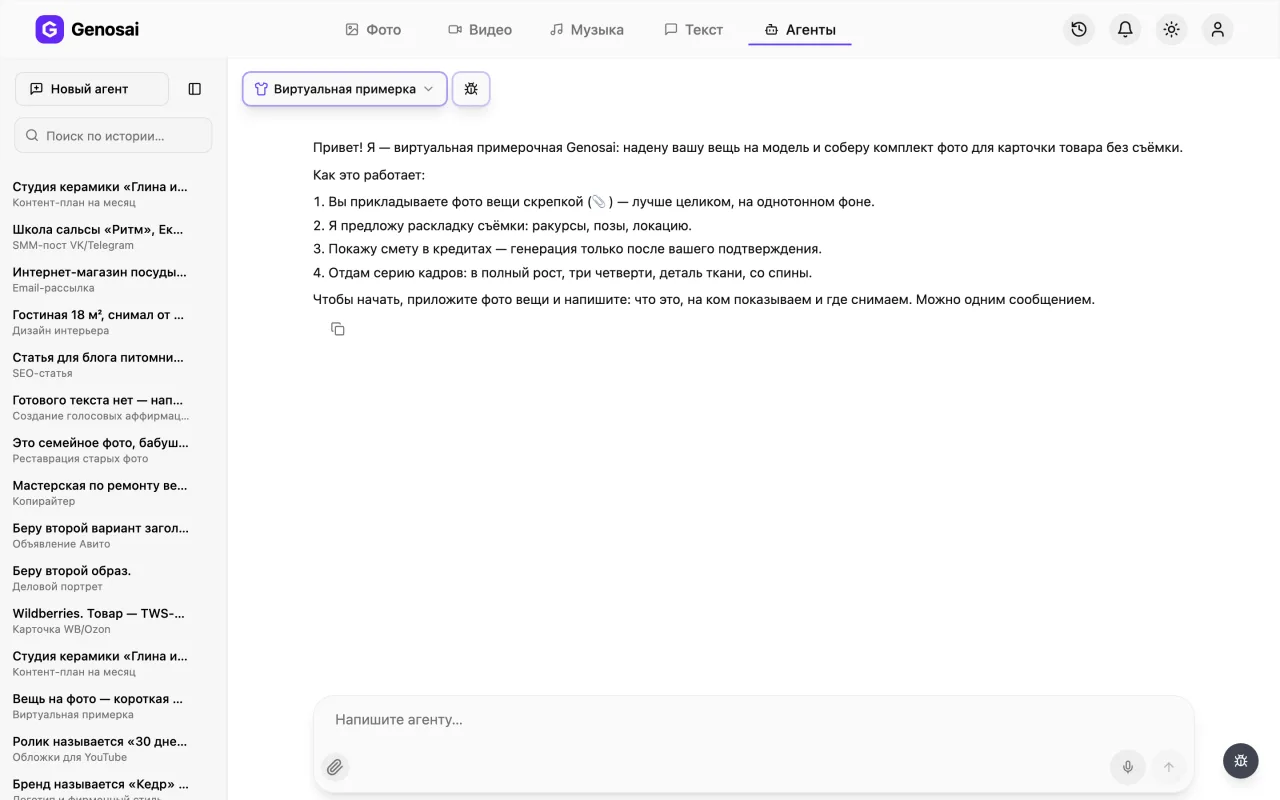
6. Step 6. Attach the photo of the item
Press the paperclip icon under the message box and pick the product shot from your phone or computer. This step cannot be skipped, because without a photo the agent has no idea which item to put on the model. A shot of the whole item on a plain background works best.
Want the item on yourself? Attach a second file with your own full-length photo.
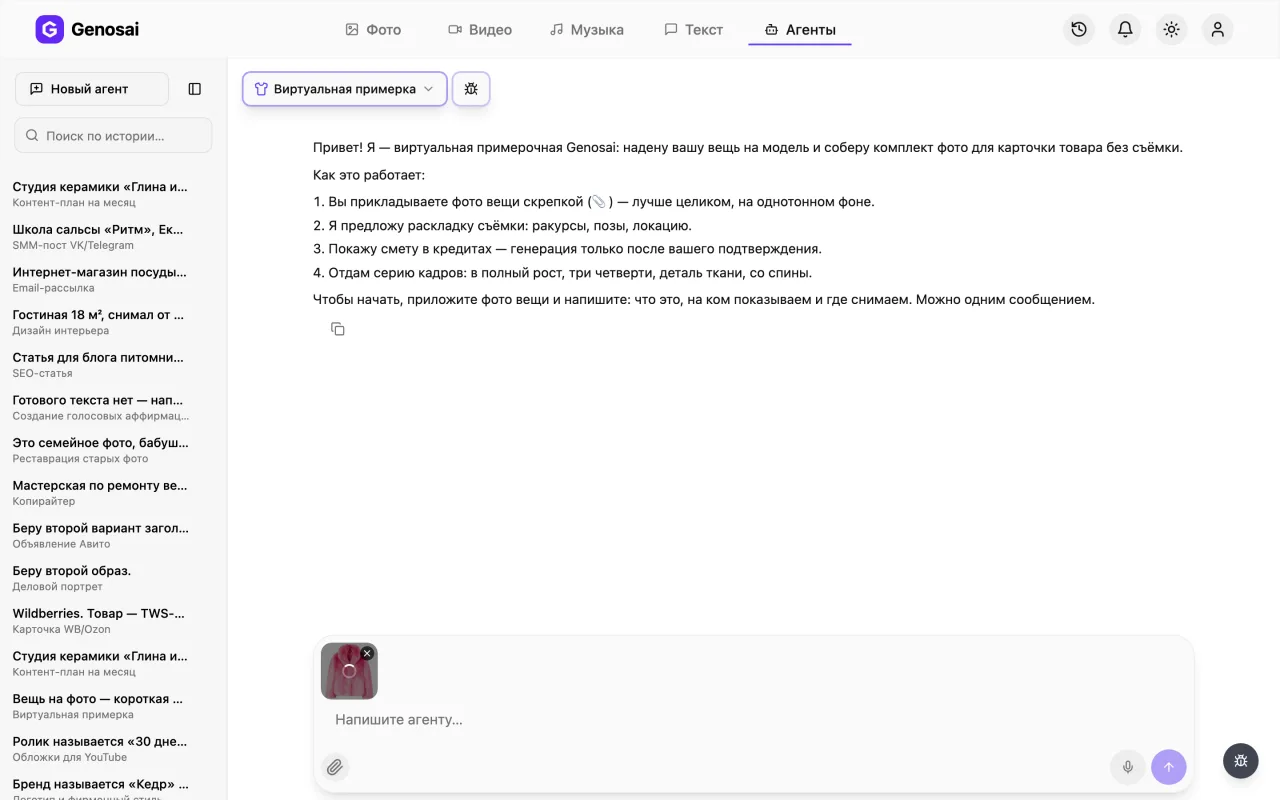
7. Step 7. Answer the questions
The agent asks what the item is, who should wear it, where the shoot happens and how many frames you need. Reply in one free-form message. In return the agent lays out a shot list in a table: which frame, which angle, which pose.
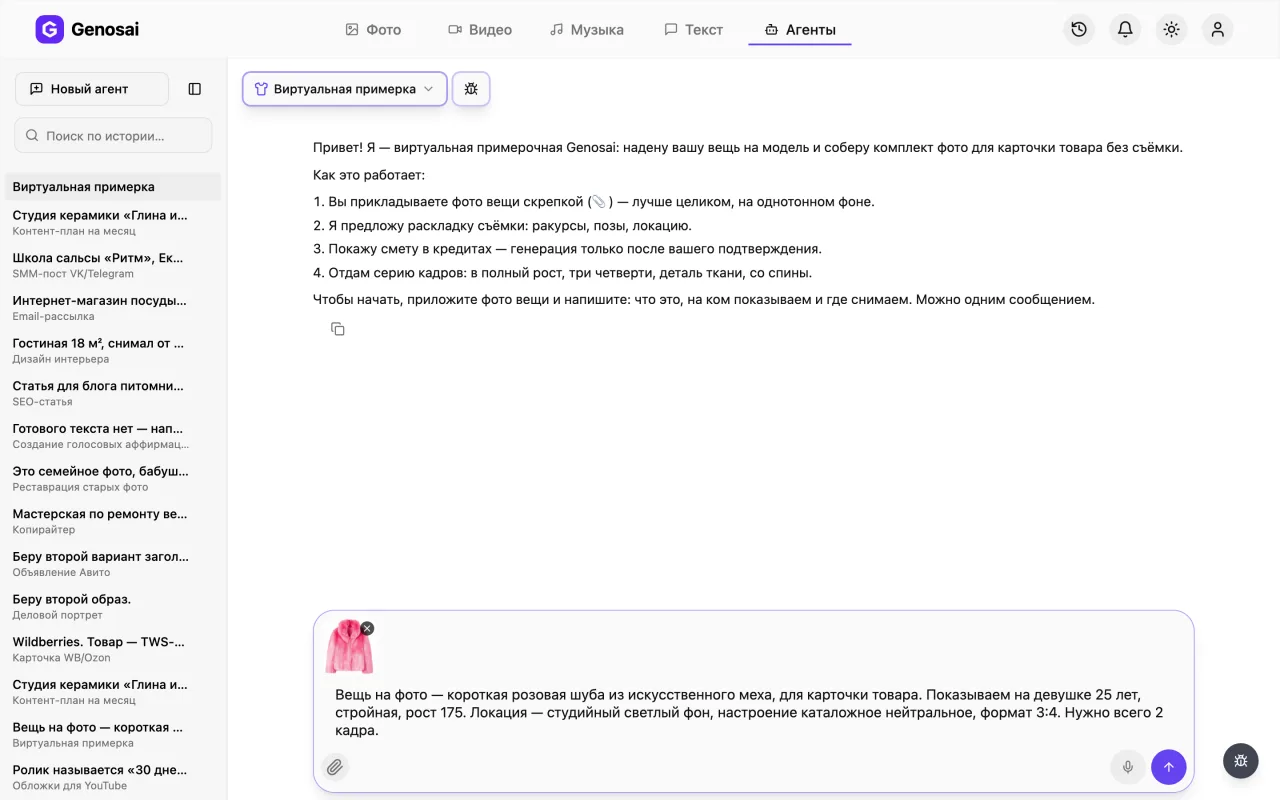
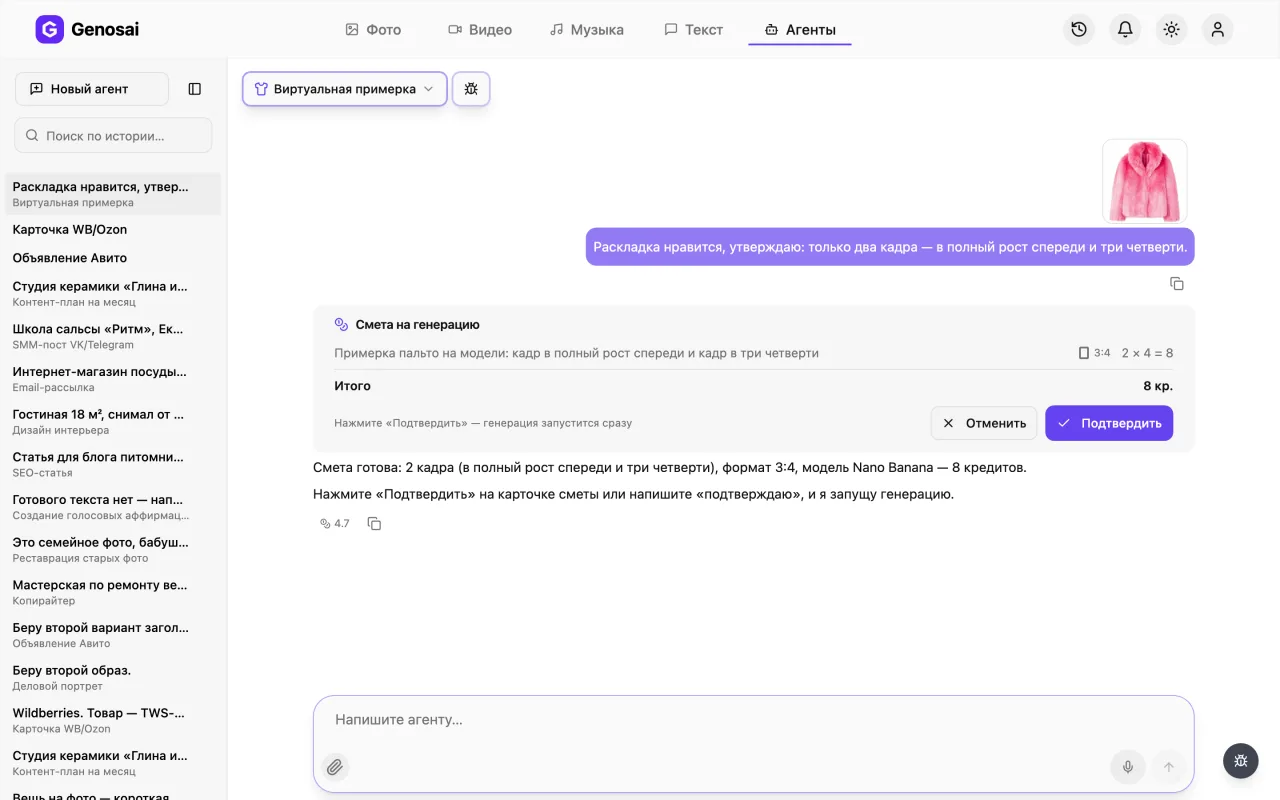
8. Step 8. Confirm the estimate
Once the shot list looks right, the agent shows an estimate card with the number of frames and the cost in credits. Read it and press Confirm. Nothing at all is charged before that button, and the estimate itself is free.
Need more or fewer frames? Just say so and the agent recalculates the estimate.
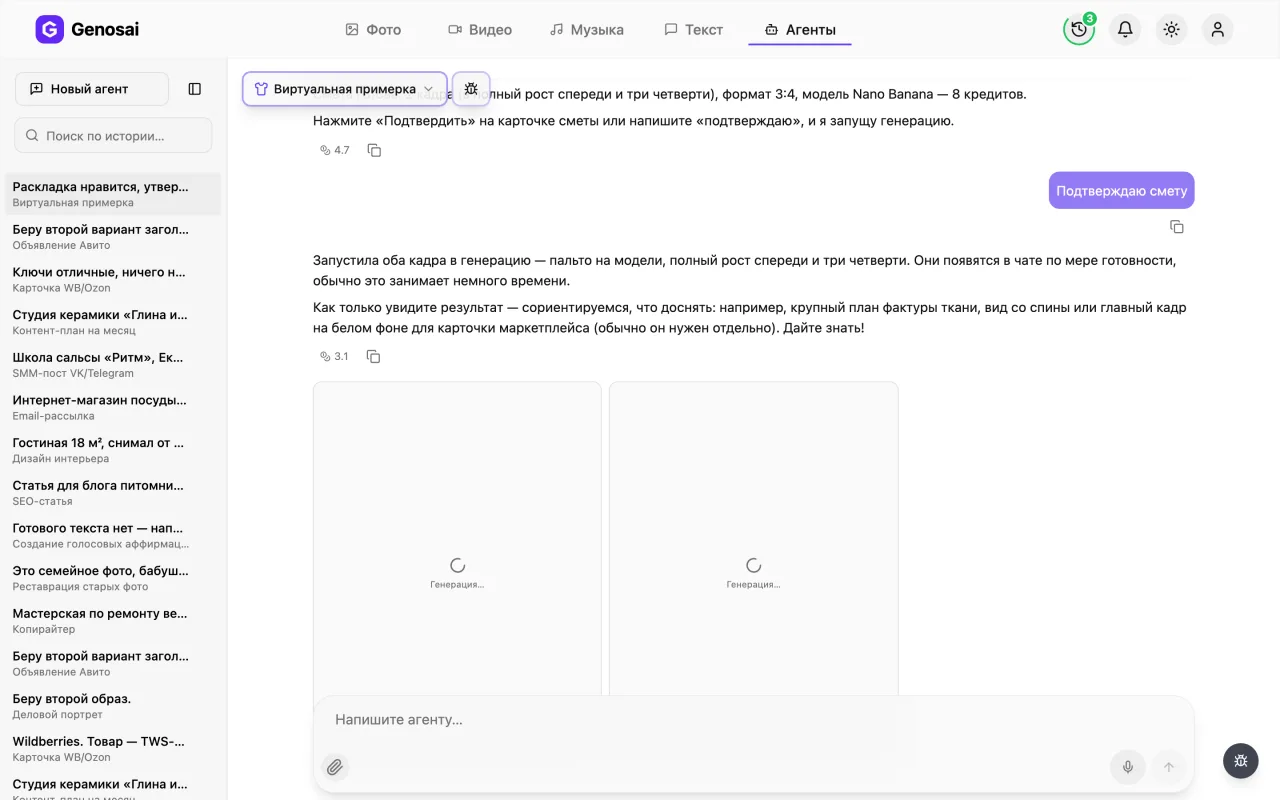
9. Step 9. Wait for the frames
Generation starts and tiles labelled Generating appear in the chat, each turning into a frame as it finishes. A series usually takes one to three minutes. You may close the page and come back later without losing anything.
10. Step 10. Collect the result
Finished frames arrive as tiles inside the chat. Click the one you want to open it full screen, where the download icon saves it in full quality. If an angle disappoints you, say so and the agent offers a small estimate to reshoot only that frame.
What this agent does
Virtual Try-On solves one very specific problem: showing your item worn by a person without organising a shoot. You attach a photo of a dress, a jacket, a pair of sneakers or a bag, and the agent produces a series of frames in which that same item is worn by a model.
The important words are "that same item". The agent does not invent similar clothing from a description. It works from the attached photo and is explicitly instructed to keep the colour, the cut, the print, the texture and every small detail unchanged. That is exactly why the attachment step cannot be skipped. Without it the model would wear an imaginary garment rather than your product.
What you get is a set, not a single picture. The standard layout is a full-length front shot, a three quarter turn, a close-up of the fabric or a seam, and a back view. That combination is usually enough to fill a marketplace listing and still leave a couple of frames for social media.
Who it is for
First of all, small clothing and footwear shops selling on marketplaces such as Etsy, Amazon, Wildberries or Ozon. Shooting every new item is expensive, and the range changes every month. Virtual try-on lets you publish a product the same day it arrives in stock.
Then makers and small independent brands. If you sew to order, knit, make jewellery or print your own shirts, there is rarely a budget for a model and a studio. Here it is enough to photograph the finished piece on a white sheet next to a window.
It also works for resellers and second-hand shops, where the same item can be shown on different body types so buyers understand how it would look on them. And finally it works for content: try-on frames go straight into feeds, stories and video covers.
What to prepare in advance
Preparation takes about five minutes and has a large effect on quality.
You need one good photo of the item. Lay it on a plain surface or hang it against a light wall, smooth the creases and shoot in daylight without flash. The whole garment should fit in the frame, sleeves and hem included.
A second shot helps a lot: a close-up of the fabric, the print, the embroidery or the buttons. It gives the agent a much better sense of texture.
Decide three things before you start. Who wears it, meaning gender, rough age, build and height. Where the shoot happens, such as a bright studio backdrop, a city street, nature or a cafe interior. And how many frames you want. If you plan a try-on on yourself, prepare a full-length photo of yourself taken from the front in even light.
Finally, make sure you have credits on your balance so you do not stall halfway.
A real conversation walkthrough
Here is what an actual exchange looks like. First what the person types, then what the agent replies.
You: *attach a photo of the dress with the paperclip* This is a khaki linen midi dress, sizes S to XL. Show it on a woman around thirty, average build, roughly 170 cm tall. Bright studio background, I need four frames for a marketplace listing.
Agent: Understood: khaki linen midi dress, female model, around thirty, average build, 170 cm, bright studio backdrop, catalogue style. Here is the shot list.
| No | What is in the frame | Pose and light |
|---|---|---|
| 1 | Full length, front | Straight stance, arms relaxed, soft frontal light |
| 2 | Three quarter turn | Half a step to the side, weight on one leg, side light |
| 3 | Close-up of the linen texture | Waist-up crop, focus on weave and seam, even diffused light |
| 4 | Back view | Calm stance, neckline and back fit visible |
The frames will be in a 3:4 ratio, which suits product cards. Does this work or should I change anything?
You: All good, but make the third frame a real macro so the weave of the fabric is clearly visible.
Agent: Adjusted: frame three is now a macro of the linen weave and stitching. The amount of work has not changed, it is still four frames. Here is the estimate. Press Confirm and I will start.
*An estimate card appears in the chat with the number of frames and the cost in credits.*
You: *press the Confirm button*
Agent: Starting the shoot, four frames. It usually takes a couple of minutes, you do not have to wait on this page.
*A minute later four finished images arrive in the chat.*
Agent: The series is ready, the files are above and clicking any of them opens it full screen with a download icon. Marketplace listings normally also need a main shot of the item on a clean white background without a model. Want me to add it as a separate single-frame estimate? I can also shoot the same model outdoors for social media.
Two things are worth noticing. First, the agent shows the plan before it counts money. Second, wording and styling tweaks do not change the estimate, because the estimate depends only on how many frames are produced.
What it costs
Try-on has no fixed price. The cost is assembled around the actual amount of work: the more frames and the higher the quality, the higher the number. That is why the agent always shows an estimate first, as a separate card, and waits for you to confirm it.
As a rough guide, a set for one product listing costs about the same as four ordinary generated images. Chatting with the agent is billed separately and costs very little, while the bulk of the credits goes into producing the pictures.
The rule that matters most: nothing is deducted before you press Confirm. You can discuss the shot list as long as you like, change the model type, swap the location or ask for a different number of frames, and all of that is free. If an image fails for technical reasons, the credits for it are returned automatically and the agent reruns only the frame that failed.
Common beginner mistakes
A poor photo of the item. A shot taken in a dark room, on a patterned blanket or at a sharp angle is the single biggest cause of weak results. The model needs to see clearly where the garment ends and the background begins.
The item is cropped. If the hem of a dress is cut off, the agent has to invent the missing part and the length may drift.
A one-word description. "Jacket" gives almost nothing. "Padded bomber jacket in navy technical fabric with a ribbed hem" is already enough for the garment to sit correctly.
Expecting an exact fit. A generated model shows the item attractively but does not replace a fitting. Always publish real measurements in your listing.
Hoping for unlimited free revisions. Every new picture is real work for a neural network, so a reshoot comes with its own small estimate. Agreeing carefully on the shot list once is cheaper.
Trying to start without confirming. Phrases like "go ahead, let us do it" are deliberately not treated as consent to spend money. Use the Confirm button, or write the single word confirm.
Why this beats a regular photo shoot
A collection shoot means studio rental, a model fee, a photographer, a retoucher, moving the garments around and at least a week of waiting. A virtual try-on takes ten minutes and needs nobody but you.
The second advantage is flexibility. Want the same item on a different body type, in a different location or with a different mood? That is another short conversation, not another shoot. Stock can go online as it arrives instead of piling up until a scheduled shoot day.
The third is predictability. You see the shot plan and the price before anything happens, rather than discovering the invoice afterwards.
The honest limitation is worth stating too. The agent produces an illustration, not a documentary record of how the garment fits. For a product listing that is perfectly acceptable, provided the sizes and the fabric composition are described truthfully.
Which agents pair well with it
Try-on is rarely used on its own. It usually sits in a chain with other Genosai agents.
Straight after a try-on it makes sense to visit the WB and Ozon product card agent, which turns your frames into full listing infographics and writes the selling description. If you also sell through classifieds, the Avito listing agent prepares the title and the text.
For social media, take the Instagram carousel agent, since try-on frames fit swipeable slides perfectly. Short video ideas come from the Reels and Shorts scriptwriter.
If your shop does not have a recognisable look yet, start with the logo and brand kit agent, because a single palette and mark make listings stand out. Website and email copy is handled by the copywriter.
The full line-up of helpers lives in the catalogue, where all agents are grouped by category.
FAQ
Do I need a real model or a photographer
No. The model is generated, while the garment comes from your own photo. The only real thing you need is a product shot taken on a phone in ordinary daylight.
What kind of product photo works best
The whole item on a plain light background, laid flat or on a hanger, with the creases smoothed out and no glare. A separate close-up of the fabric or print improves the result noticeably.
Can the item be shown on me
Yes. Attach your own full-length photo along with the product shot and say that you want the try-on on yourself. The agent uses both images and shows the item on your figure.
How much does it cost
There is no fixed price, it depends on how many frames you order and at what quality. The agent shows the exact amount in an estimate before starting, and nothing is charged until you confirm.
Can I use these photos on a marketplace
Yes, the images are yours to publish anywhere. Keep in mind that the fit shown on a generated model is an illustration, so your listing still needs honest measurements and a real size chart.
What if a frame comes out wrong
Tell the agent exactly what is off, whether it is the pose, the lighting, the location or the angle. It rewrites the instruction and gives an estimate only for the frames that need redoing, not the whole series.
Will my conversation survive if I close the tab
Yes. Every chat and every finished file lives in the studio history panel on the left. You can reopen an old conversation and add a couple more angles even a month later.